Garrattfan's Modelrailroading Pages
NS 6200 class
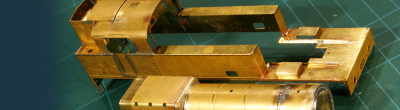
Finishing touches and final assembly of NS6228
| At the closure of any project there is always a host of chores that seem to keep you thinking "almost done" forever. Accept it and do the jobs. You won't be finished until they are all done.
|
|
 |
A last minute design change was sparked when I did a test assembly and light accidentally fell into the drivers cab. I hadn't expected the absence of a boiler backhead to be very conspicuous in the dark cab but I was wrong. The silvery weight was shinily present. I could do two things. Paint the weight or provide a backhead. I chose the latter. I had to order two hook couplers anyway so I included a boiler backhead in the order. |
 |
A week later this shining beauty arrived. |
 |
As the motor and the drive are in the way I needed to cut it ... |
 |
... and throw the lower part away :-( |
 |
After some filing |
 |
I gave it a quick base coat and test fitted it. |
 |
Black coat ... |
 |
... followed by a dark gray wash to get some depth in the backhead. I also scraped away the paint where the parts needed to stay brass. Then I gave it a dull clear coat. |
 |
Getting the backhead in place in a fully assembled superstructure proved to be a challenge. After several attempts on getting the thing in the correct place and remain there until the glue had set, I found a simple solution. I positioned strips of scrap brass on the rear and carefully lined them out to be exactly 0.5 mm from the edge. I fixed them in place by adding a drop of thin CA. The brass strips would now take care of the positioning of the backhead in the boiler. |
 |
Like this. Once in place two drops of CA fixed the backhead temporarily in place. |
 |
Then epoxy was mixed and added to make the bond permanent. |
 |
Next I turned to the couplers. They are functional hook couplers. They can be drawn out by trailing cars to allow for sharp curves. The spring draws the hook back in. |
 |
There is a square hole in the buffer beam. I needed to open it up a little. |
 |
The spring was added and it was secured by a piece of wire that runs through a hole in the back of the stem, barely visible at the left end of the spring. |
 |
Test fitting is essential. |
 |
Another chore down! |
 |
After all working on the superstructure some touching up of the paint work was necessary. Not much though. |
 |
Coal was mixed with Ballast Magic of Deluxe Materials |
 |
and poured into the coal bunker. It is then sprayed with water and it set in place. |
 |
|
At last: Final Assembly |
|
 |
Final assembly consists of only three steps. The superstructure moves easily over the chassis, starting from the back. |
 |
The secret screw under the safety dome is screwed tight |
 |
and then the screw under the leading axle.
The project is done. |

Sign my
GuestBook